Showing posts with label easy clean. Show all posts

Saturday, October 3, 2009

Noodle in a bottle: the repost

This is a re-post of a quiet activity that was intended to be for the little ones, but everyone had a blast. I was inspired by the loves school blog and we added our own twist.
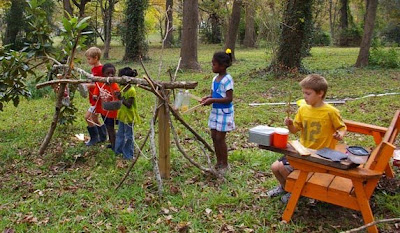
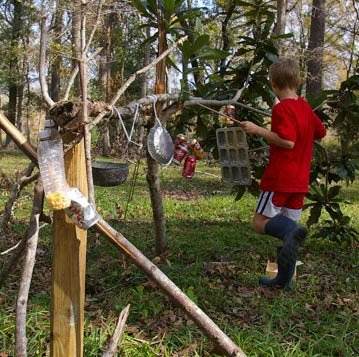
The little ones each got pan to catch the broken noodles with their goal being not to break any noodles. My youngest son is in need of gentleness training. The boy is a bull in a china shop. LOL Then they each got noodles and a water bottle. To add a challenge we added tape to the top of the bottle. Very simple, very fun! The big boys decided it was a building project and took it in a direction that I could not have planned.
This activity passed the easy set up, long playtime, and quick clean-up test. When I am looking for/evaluating a kiddo activity I look for a quick & easy set up, a long playtime, and quick & easy clean-up. If the activity takes too long to set up, my kiddos have lost interested or gotten into mischief before we start. If the clean-up is too intensive it gets left out until the kiddos go to bed...not good! :) So if your time to set up + your time to clean up is less than half the playtime the activity makes the cut at my house.

Noodle in a bottle: still going strong

We all need those little "standby" actives. You know the ones for those times. Those times when we count the seconds until daddy come home, those times when everyone is ready to go but we still have an hour to kill, those times when I have just one more thing to do but the kids don't have anything ;) to do. Well, this is one of our standby.
It's very simple...Noodles!
Yup, just noodles. Each time they get 'em out a new activity is created because the kiddo's imagination dictate the fun. On the bottle shelf of our pantry (just above the recycle/inspiration bin) sits a few plastic containers labeled "Kids Only"! One of them is filled with pasta of all shapes, sizes, and colors. Under the microwave is the "Kids Only" drawer filled with all kinds of kitchenlike treasures. The kids mix and match from the Kids Only containers, recycle/inspiration bins and Kids Only drawer.
No planning, easy clean-up, fine motor stills, imagination, entertained kiddos...works for me.

Monday, July 13, 2009

50 foot slip-n-slide with sling shot

I have been envisioning creating a 50 foot slip-n-slide in our yard. Saw one on Jessica's blog with a rope to sling shot the kiddos at blistering speeds down the slip-n-slide. Oh this is something we have to try!! :) 
So I stop at the local big box home improvement and pick up a big plastic tarp and start calling/emailing friends last night. Well, I bought the wrong tarp, I couldn't find the stakes, but we made it work. When we make it again, this is what we will use:
  • 1 or 2 large plastic tarp (at least ten feet wide)- the kids could all make it to the end of our fifty foot slide
  • stakes to anchor it to the ground
  • 2 or 3 bottles of  baby soap (so it doesn't hurt their eyes)
  • hose and water (we used a spinkler and hose to keep it nice and wet)
  • rope or elastic band to sling shot the kiddos
The preparation is easy, lay out the tarp and stake the edges down. We used wood but, stakes would have worked better. Pour on the baby soap to make it extra slippery, then add water. Make sure the slide stays nice and wet.
Be careful and have fun. This is a great group activity, can you already see your small group, moms group, or close friends on he slide. Jessica said a friend used it for  birthday party. Oh fun!

Friday, July 10, 2009

homemade baby food...

I have a new toy. I loved making homemade baby food for my older kiddos, but it was wasn't this easy. This is a Kid Co food mill. I have to say, I love this thing.  I bought this one from baby earth. If you use the referral code  g0kKuz you save $5. This and a few storage containers will be all you need to serve the best homemade baby food. 
Just place the food in the middle and push down as you turn the handle. My seven and eight year old can even make homemade baby food with this mill. I put the extras in a container to freeze for days that we are on the go. OK, really it is for days when we are eating fast food and there isn't anything that I am willing to grind up and feed to the babies. :) The mill comes with a carrying case and spoon so it is easy to stick in the diaper bag and you can serve it right out of the top. No worry of kids cutting themselves if they get into the diaper bag, there is no sharp blade. My favorite part is that it is sooo easy to clean. Everything in life should be this fun and easy. :)
When I made homemade baby food in bulk (lots of flavors in one day) for my older ones I just put it in ice cube trays to freeze and stored them in a zip loc. I am going with single serve containers to save a step this time. There are lots of great babyfood recipe books, but I just follow the basic rule of raw fruit, cooked veggies. 
Happy Baby Food Making!!

Monday, June 8, 2009

finger paintin' good!

Warm day, kiddos in clothes that I don't mind painted...sounds like a perfect time to finger paint. They worked together on this masterpiece.  I think I may have enjoyed hearing their imaginations run wild as much as they enjoyed painting.Fingerpainting is simple at our house. You fingerpaint, you play in the water, you dry in the sun THEN you come back inside. :)

Friday, May 8, 2009

What makes music?

To quote elmo, "Everything makes music!" These are some of our favorite homemade musical instruments. 
1. Box with a circle cut out of the front with rubberbands.
2. Container with lid filled with beans or pasta.
3. Anything that can be hit. With a new baby at the house we have found a lot of new uses for formula cans.
4. A terrible ruckus machine. I had seen something similar in a book called The creative family.
May your day be filled with the sweet sound of music!

Wednesday, April 22, 2009

Straw Painting

Here is a fun twist on painting. Arm the kiddos with a straw, small cup of watered down paint, and sponge. Make sure you don't put more watered paint in the cup than you are willing to have spilled. Have the kiddos dip the sponge in the watered paint and place in on the paper. Using the straw, blow the paint into a creative piece of art. 
Enjoy!

Tuesday, April 21, 2009

Organizing with kiddos...

In honor of the "be more organized" resolution that we seem to make to ourselves, we are going to talk about organization with kiddos. Organization is only useful when it fills a need. My love for organization comes from the desire that the "have to(s)" take less time, so we can fill our days with the "get's to(s)". Think of your heart's desire before you invest your time and effort.
1. Narrow your target.
Think of where you want to start. Clear your mind of what you want to have done this year, this week, or this millinium. Know that each small change brings more "get to" time to you and your family. Like I tell my kiddos when they ask "Are we there yet?" on a long trip. "We are getting closer every second." Once you start tasting success the desire will grow, but met with frustration the project will end. So we start small, "I want to organize my daughter's dress up clothes." is a much better goal than "I want to organize my kiddo's stuff."
2. Determine your audience.
Simply put, who is going to use the stuff I am organizing. When organizing my kiddo's room I use the 5 minute rule: Can I straighten up this room in 5 minutes? When we had three two year olds we used big tubs and all the toys went in. The toys that were stored in that room had to fit into the tub(s). So, if a toy did not have a special place or fit in the tub we moved it to another room(or house). Now that the little ones are four we have separate tubs for dress-up, babies, and other. We keep special toys where they can't reach. These toys need to be put away properly. One card in not near as fun as a whole deck. So, I get them down for their special playtime and ensure they are put away correctly. Quiet time toys, stored separately with limited access, hold little ones attention better than if they were left out.
4. Be inspired and Start
Inspiration can be found with-in or from other sources. Use your friends, tap into the knowledge of books or internet. I usually do a quick google search before I head to my target area. Just be careful not to buy yet. Get your hands dirty and use temporary storage until you have taken inventory of what you need. Shoe boxes, ziplocks, grocery bags, etc. will do just fine to create your new organization system. I find it less overwhelming to work left to right. One of your most important organization tools will be the trash bag...don't store JUNK! Then go looking around the house before you part with your hard earned dollars for new containers. You may be suprised how many perfect sized containers are waiting to be used.
5. Finishing touches
Now that you know what size and location for the containers, start thinking big. Make your storage work together. I have a few favorites that I use over and over. When I buy small plastic boxes I head to the same place for the same style. All umpteen clear plastic boxes in my house coordinate and fit together. So think big, you may only be buying 5 boxes this time, but think about the variety of uses and extended availablity of that piece. In this project I used the same zipper bags that we use in our homeschool drawer. Now, make sure you have growing room. If you have room but not the need, grab a few extra boxes/bags and leave them empty.
6. Relax and Celebrate
Enjoy the step you have taken and savor the feeling of success. Sometime my best attempts are foiled my little hands. Thus making them more frustrating or more time consuming to keep up than if I would have left it alone. That simply means there is a better solution waiting to be discovered. But, this time when I start I have a bit more knowledge, (of what doesn't work & why) my new solution is bound to be better.
www.cleverkiddos.com
do not reproduce without written permission of author

Wednesday, April 15, 2009

Noodle in a bottle...

A great quiet activity for kiddos of all ages. Although I intended it to be for just the little ones, those clever kiddos had other ideas. I was inspired by the loves school blog and we added our own twist
The little kiddos each got a pan to catch the broken noodles with their goal being not to break any. My youngest son is in need of gentleness training. The boy is a bull in a china shop. LOL Then each kiddo got noodles and a water bottle. To add a challenge, we added tape to the top of the bottle. Very simple, very fun! The big boys decided it was a building project and took it in a direction that I could not have planned.
This activity passed the easy set up, long playtime, and quick clean-up test.

Thursday, April 9, 2009

Easy painting with kiddos...

Painting can sometime be an intimidating activity. Visions of your children looking like these may be enough to make your blood run cold. With a little preparation painting can leave little clean up. Painting outside is my first choice, but when done right inside can be just as easy. Preparation is the key, these are the simple step I use to prepare:
  1. First I have a tablecloth to cover the table.
  2. Place a bag of wipes and a small bottle of lotion on the table. I store the table cloth, lotion, and wipes in a drawer next to our table so they easily accessible.
  3. With the table covered I get my tackle box of paint. Paint-shirts, paper cups, disposable plates, paint, and brushes are stored in one tote. Putting the paint on a plate keeps is contained and gives a great pallet for mixing. Best of all I toss it when I am finished.
  4. Just before we start painting I lotion up my little artists hands. This works very well with ink projects too. Hands are so much easier to clean up if lotions is used first.
I let the kids choose their colors for painting, fill their plate and let them get started. Once they begin I place a small (very small) amount of water in their cup and set it on a napkin. I let them paint as long as they are interested, but before they get bored, I start talking about what we do when before we leave our table. As long as they take off the paint shirt and wipe their hands (or have them wiped) with a baby-wipe they are free to get down. We have a line with clips hung in our garage that works well drying the art created outside and prevents them from being blown away. I place the paint back in the tackle box after each squirt, so all I need to do is place the art in a safe place, put the napkin in the cup and toss the paper products. A quick rinse of the bushes and a roll of the tablecloth completes our art project.
The pictures above were taken when oldest son was young. These are a few of his friends that had come over to play. After a good coat of lotion, they took off clothes that couldn't get paint on them and replaced them with ones that could. I gave them each a color and they covered themselves, the paper, and each other with it. I had a roll of newsprint unrolled in the back yard and they walked, crawled, ran, patted, and rolled on the paper. They had a blast and after a spray with the hose and quick towel dry they were ready for the next activity. I let the sun dry the painting and sent home a section with each boy.